How to Use Halation Lab
A complete, step-by-step guide to recreating the iconic film halation effect on your digital photos. No software required. Everything happens in your browser, privately and for free.
Film Halation
Recreate the red glow and highlight bloom of CineStill 800T and other film stocks.
5 Precision Controls
Fine-tune spread, amount, red saturation, threshold, and grain for full creative control.
4K Export
Download your processed image at full resolution, ready for prints and portfolios.
Upload Your Photo
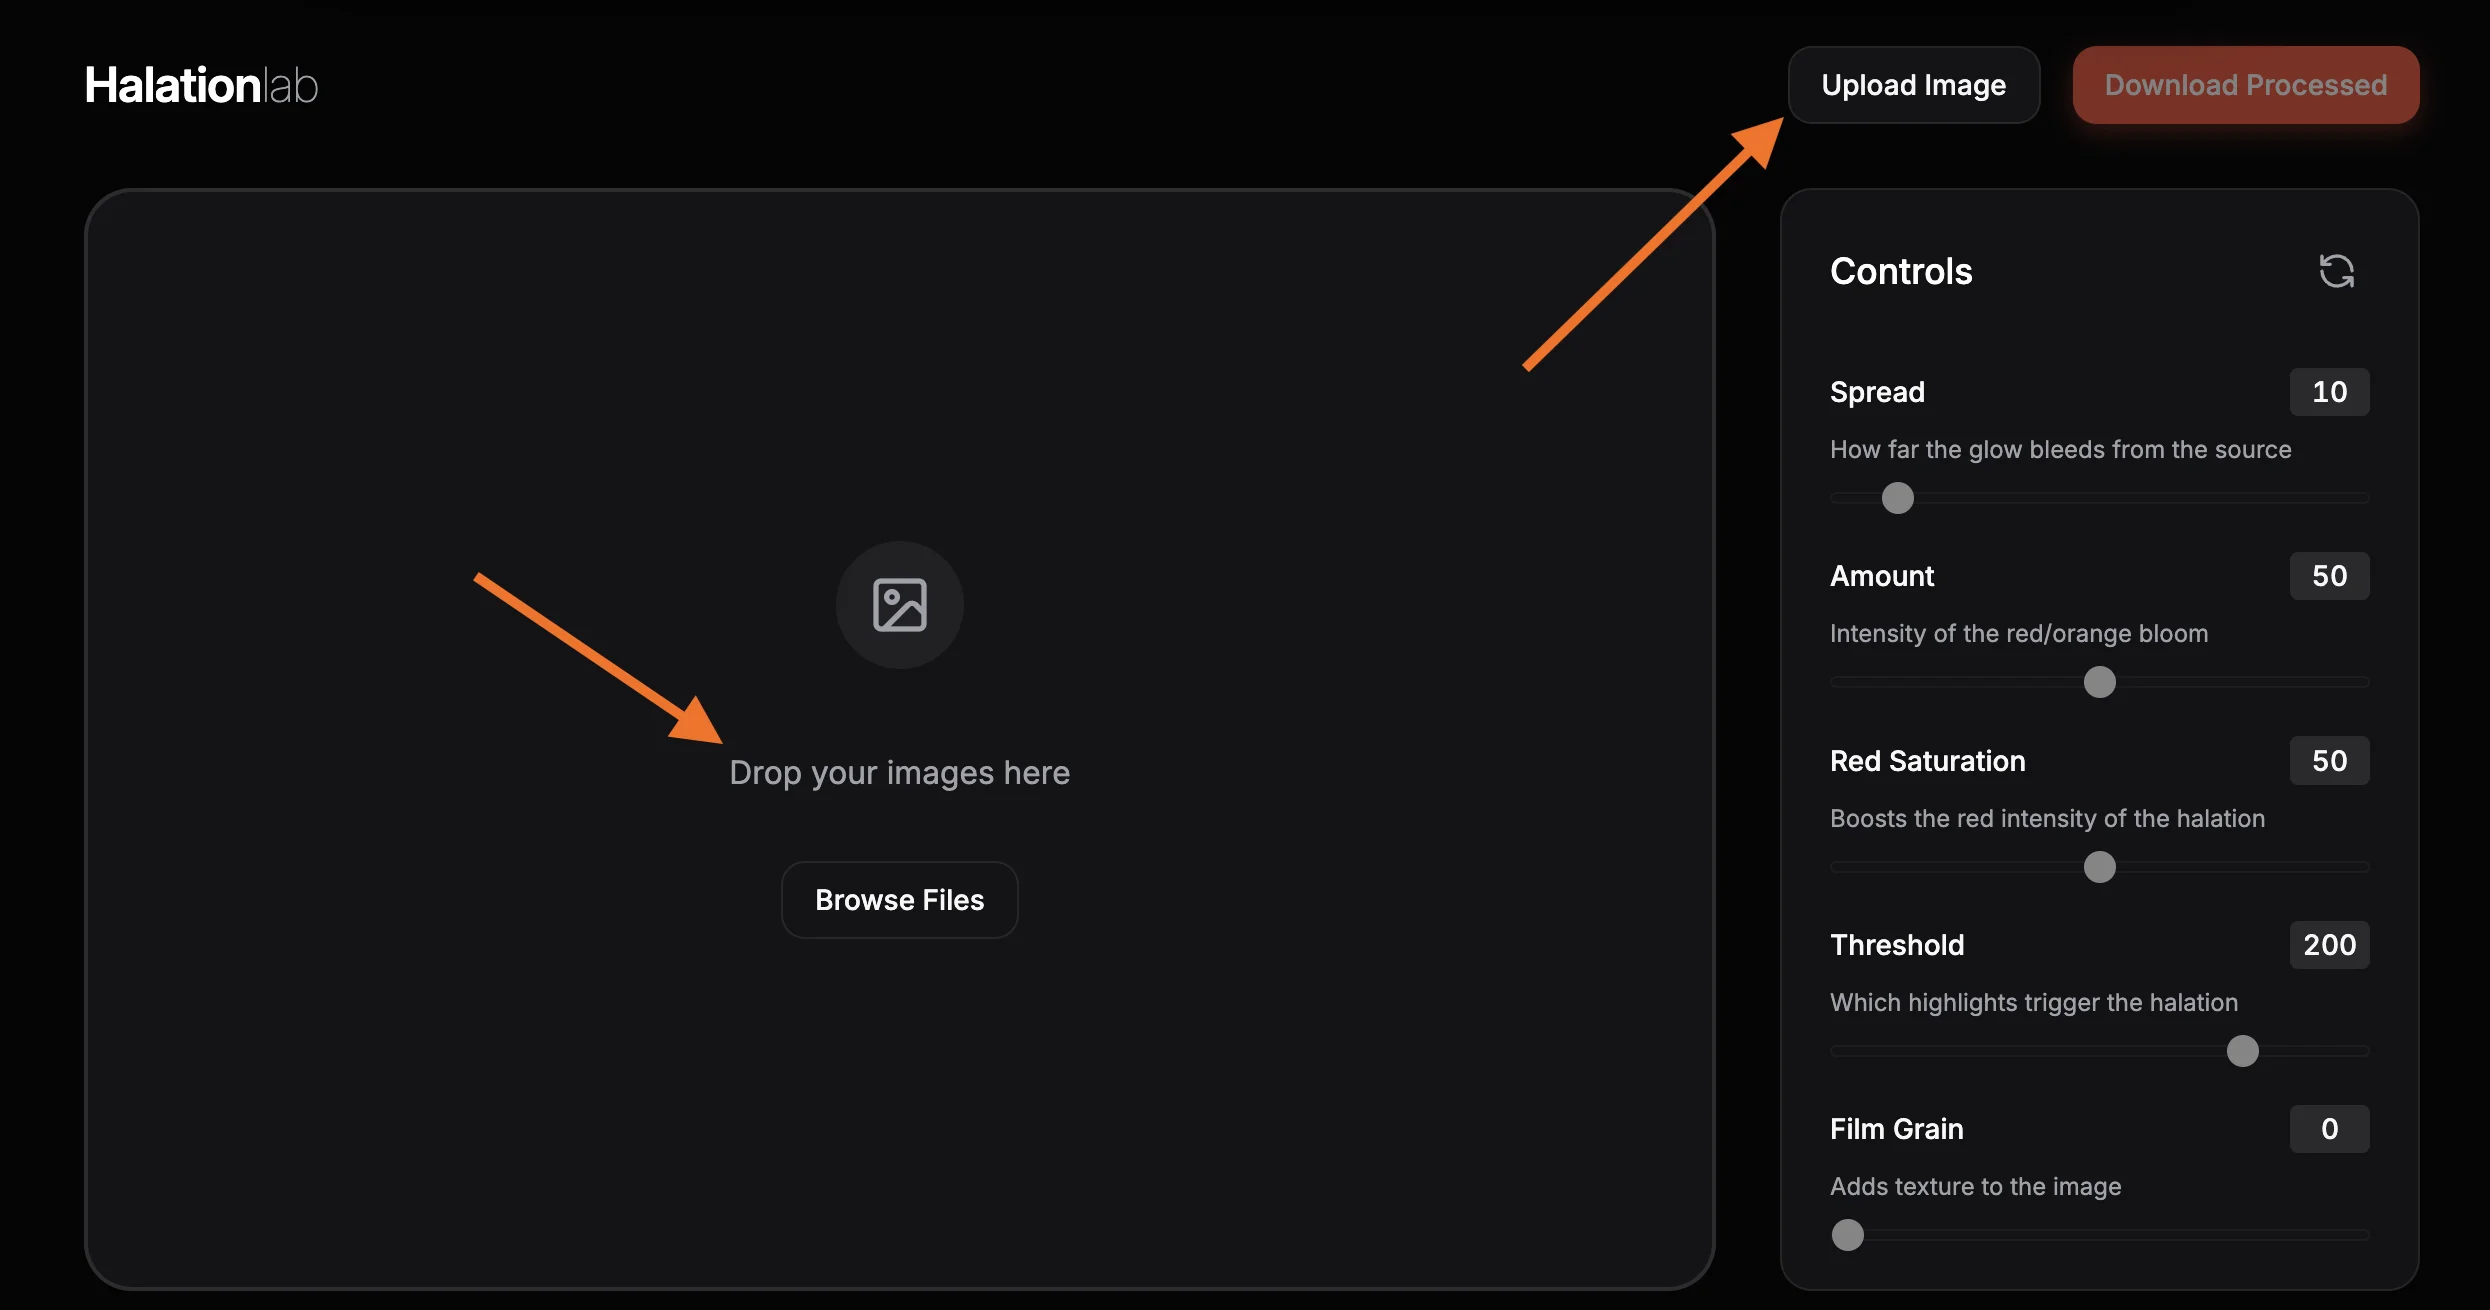
Start by dragging and dropping your image onto the canvas area, or click "Browse Files" to select it from your computer. Halation Lab supports JPEG, PNG, and WebP formats. The image is processed entirely on your device using WebAssembly. No server upload is ever required. For the best halation effect, choose a photo with bright highlights like streetlights, neon signs, sunset backlights, or candles.
Understand the 5 Controls
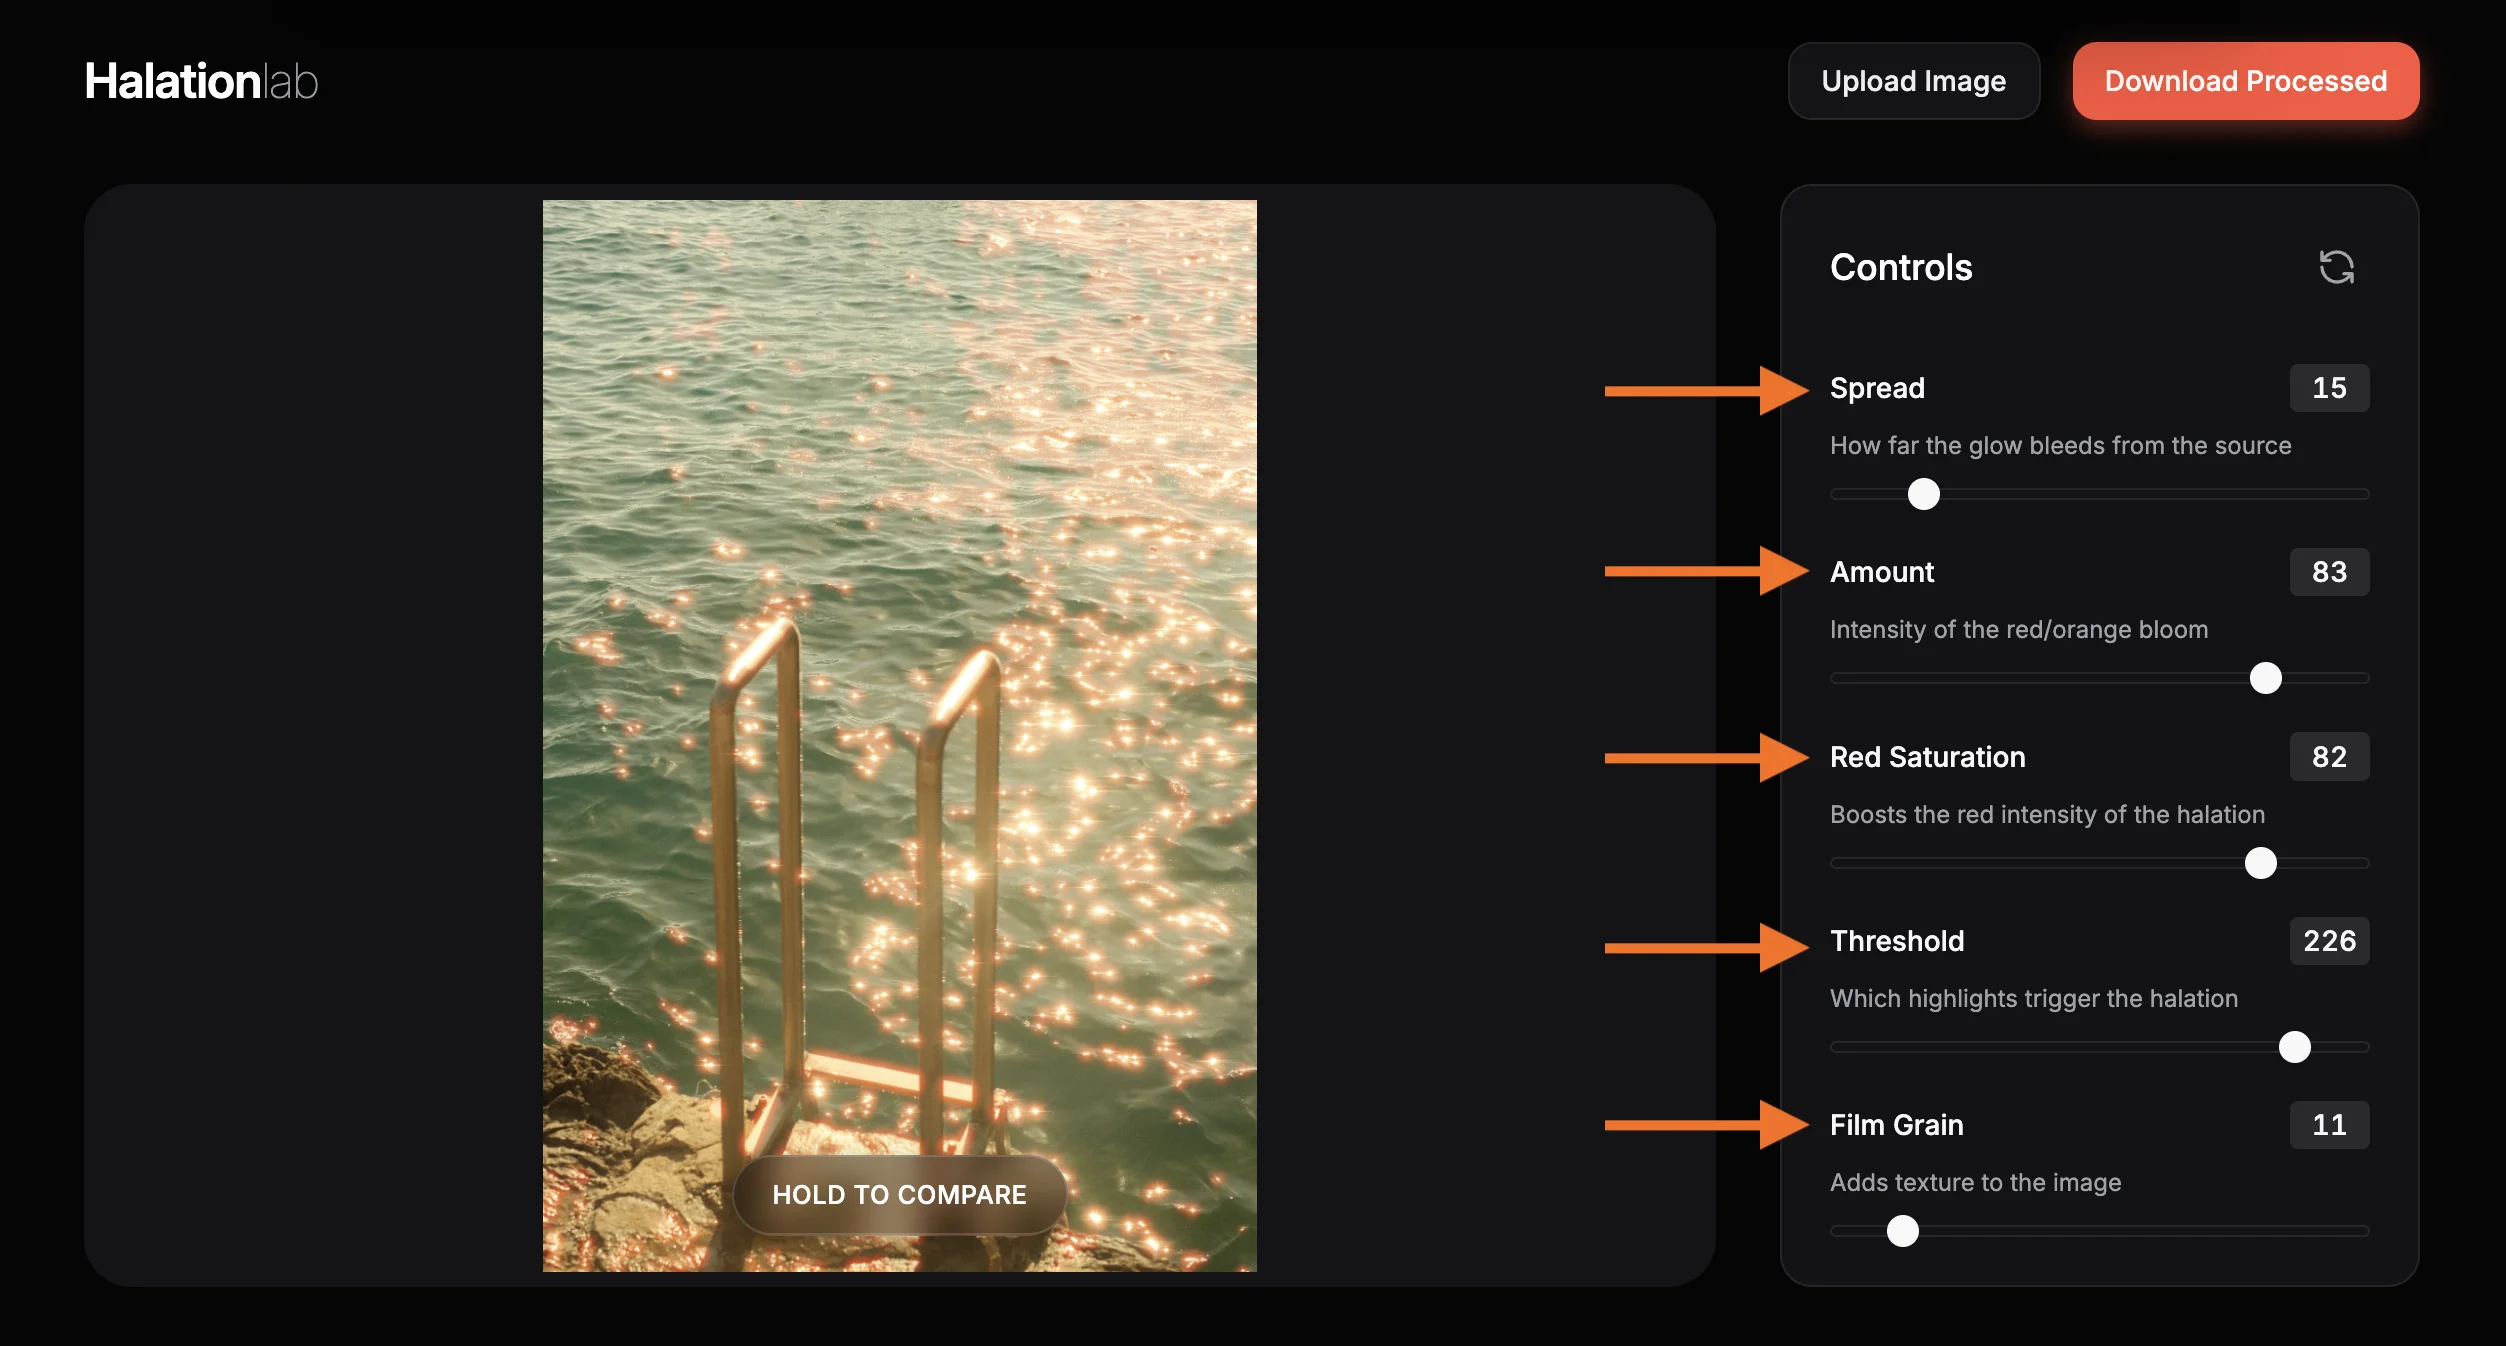
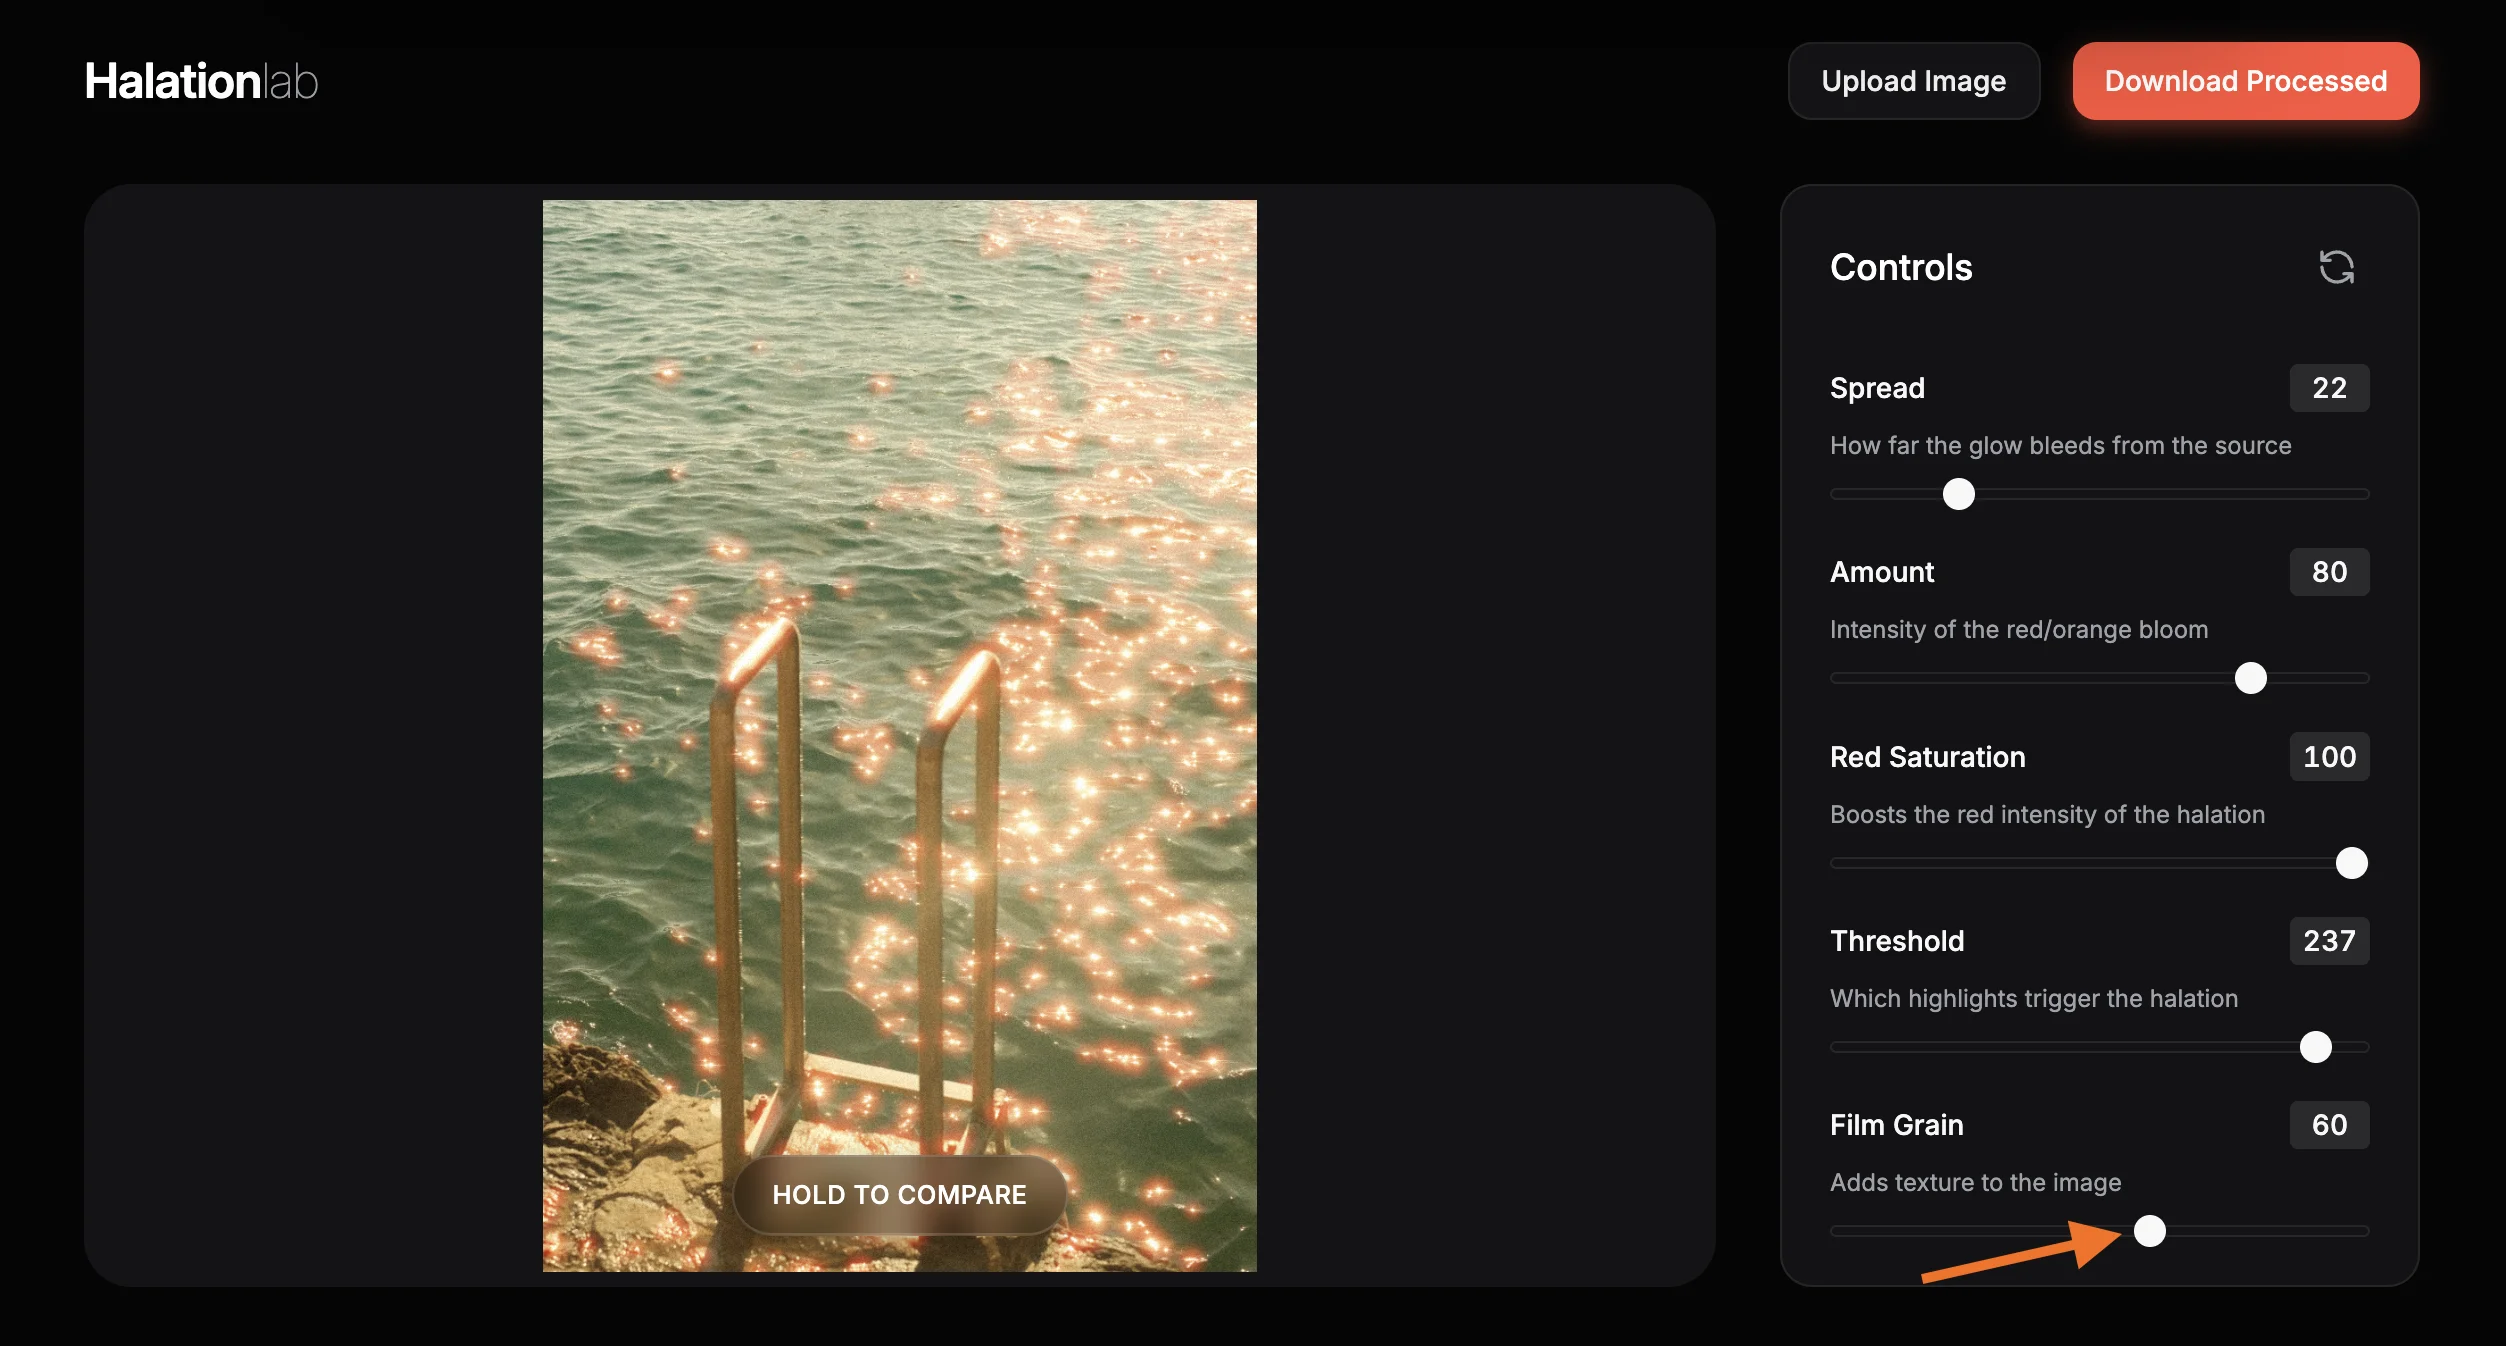
Once your photo is loaded, you will see five sliders in the Controls panel on the right. Each slider controls a different aspect of the halation effect. Take a moment to understand what each one does before you start tweaking. The default values give a subtle, balanced halation that works well on most photos.
Adjust Spread & Amount
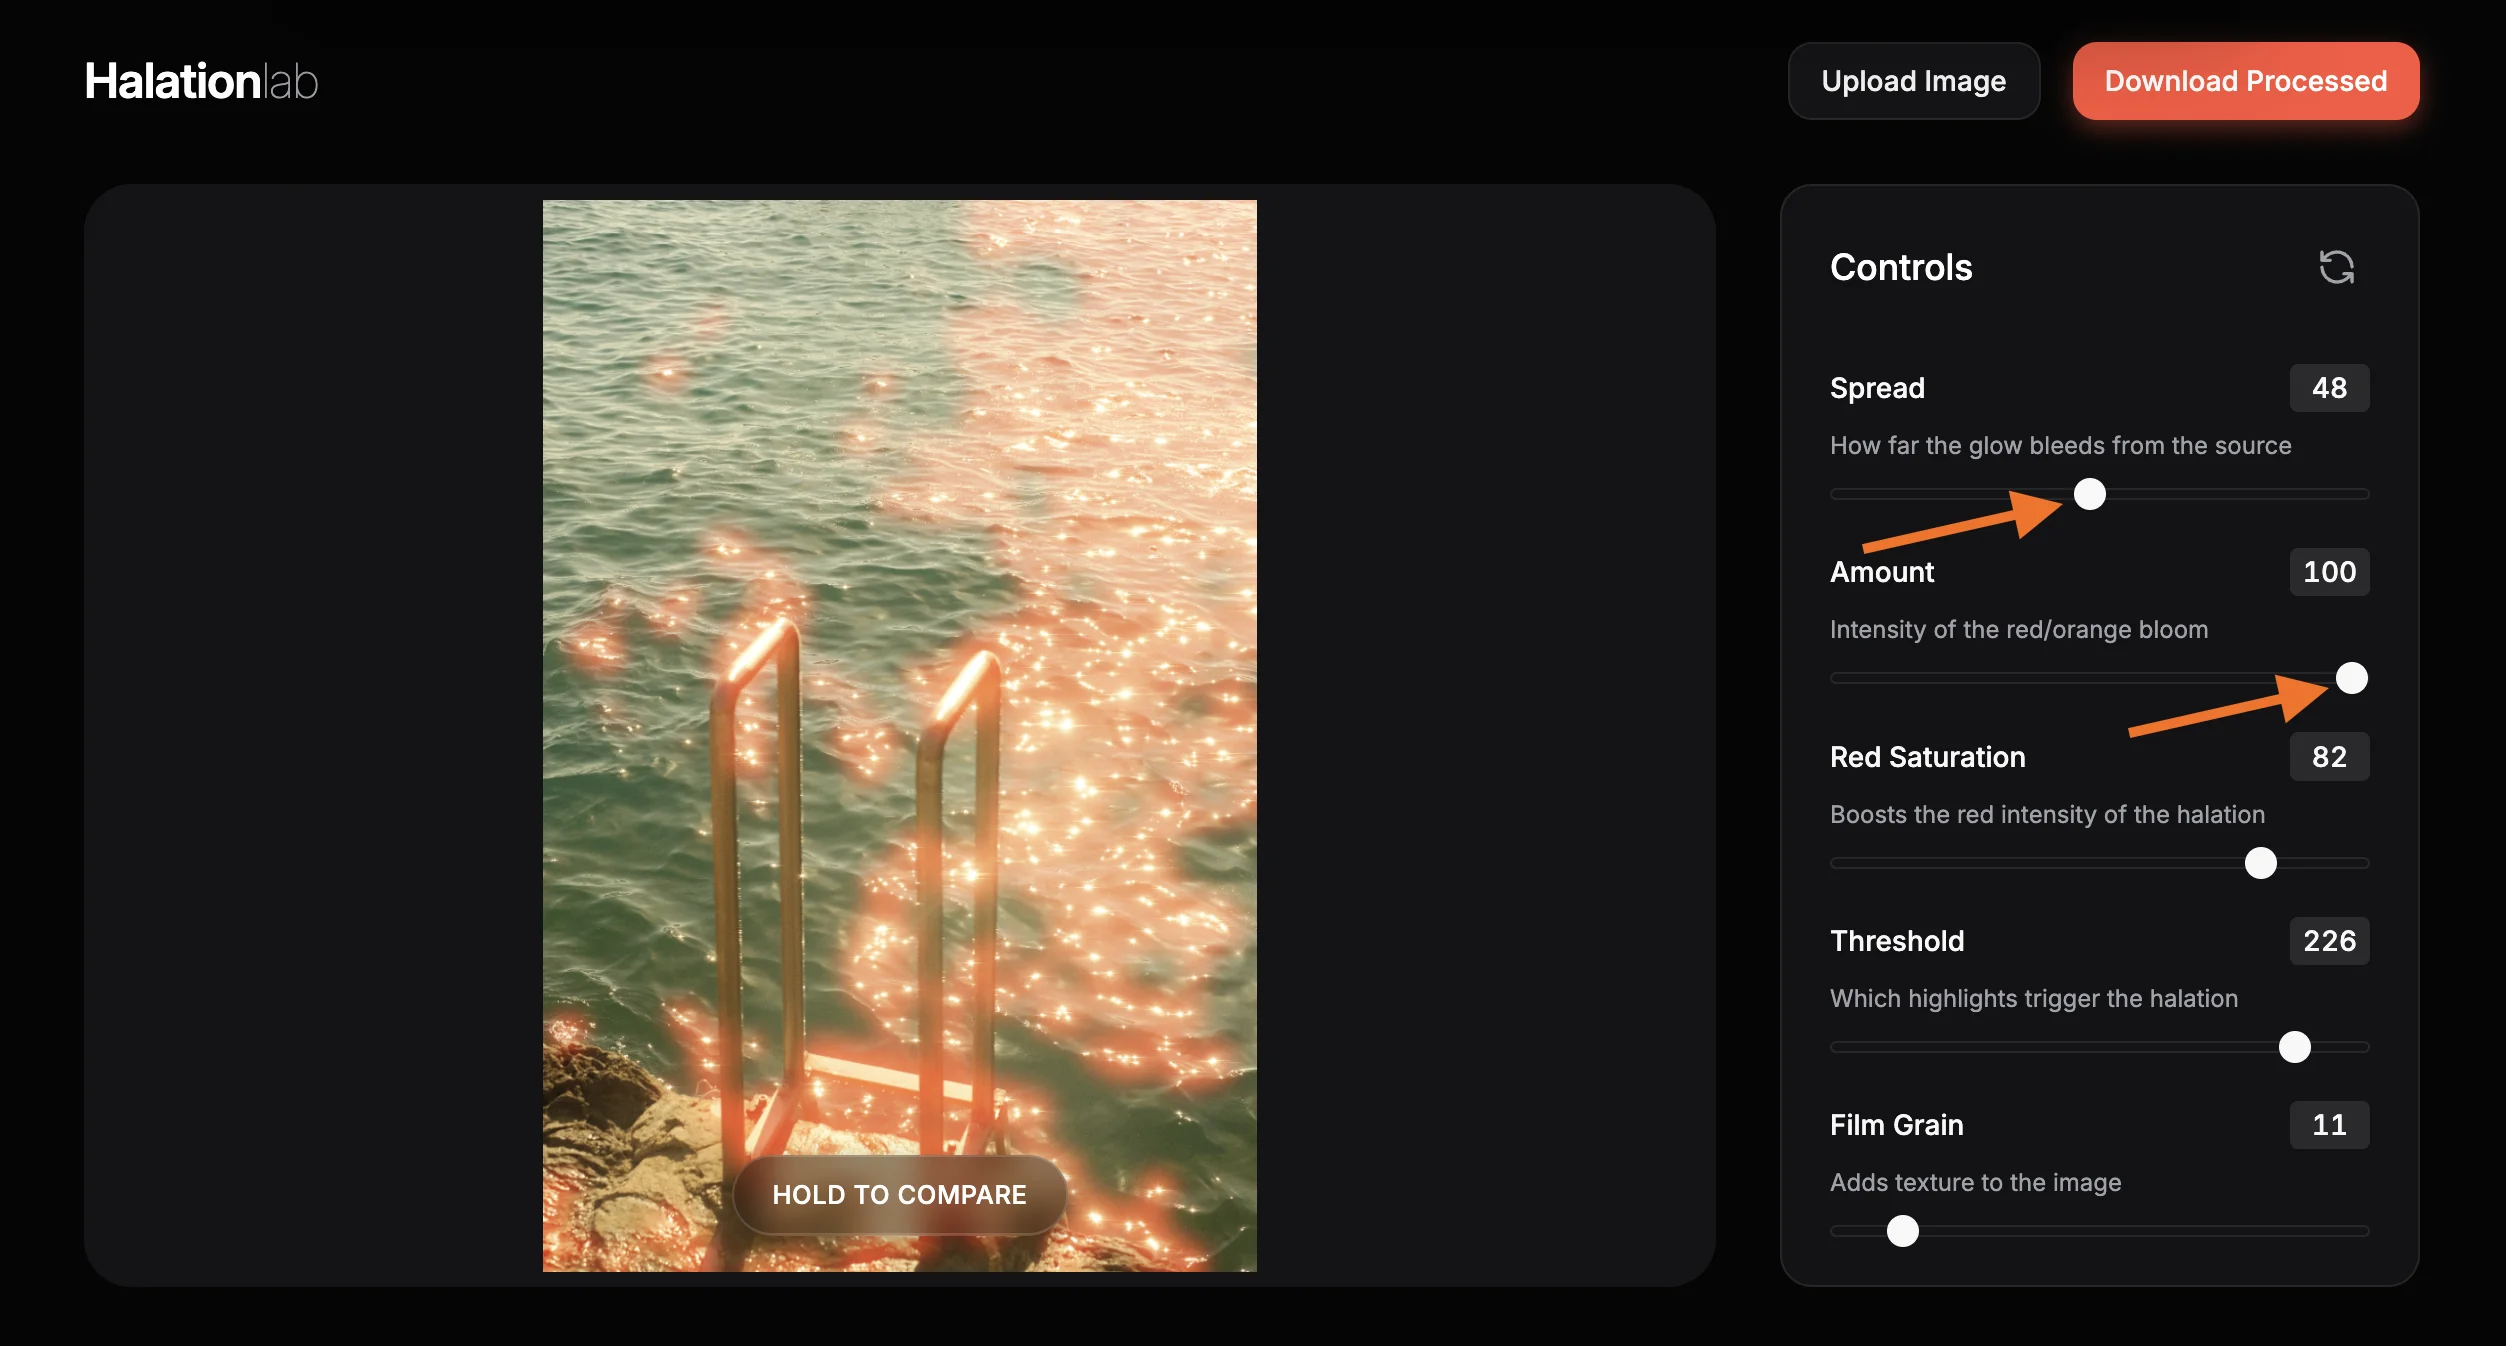
Spread controls how far the glow bleeds from bright highlights. Think of it as the blur radius of the halation. Increase it for a wide, dreamy bloom; decrease it for a tighter, more contained glow. Amount controls the intensity of the red/orange bloom added to the highlights. Push it high for a dramatic CineStill 800T look, or keep it moderate for subtle film warmth. These two sliders have the biggest visual impact.
Fine-Tune Red Saturation & Threshold
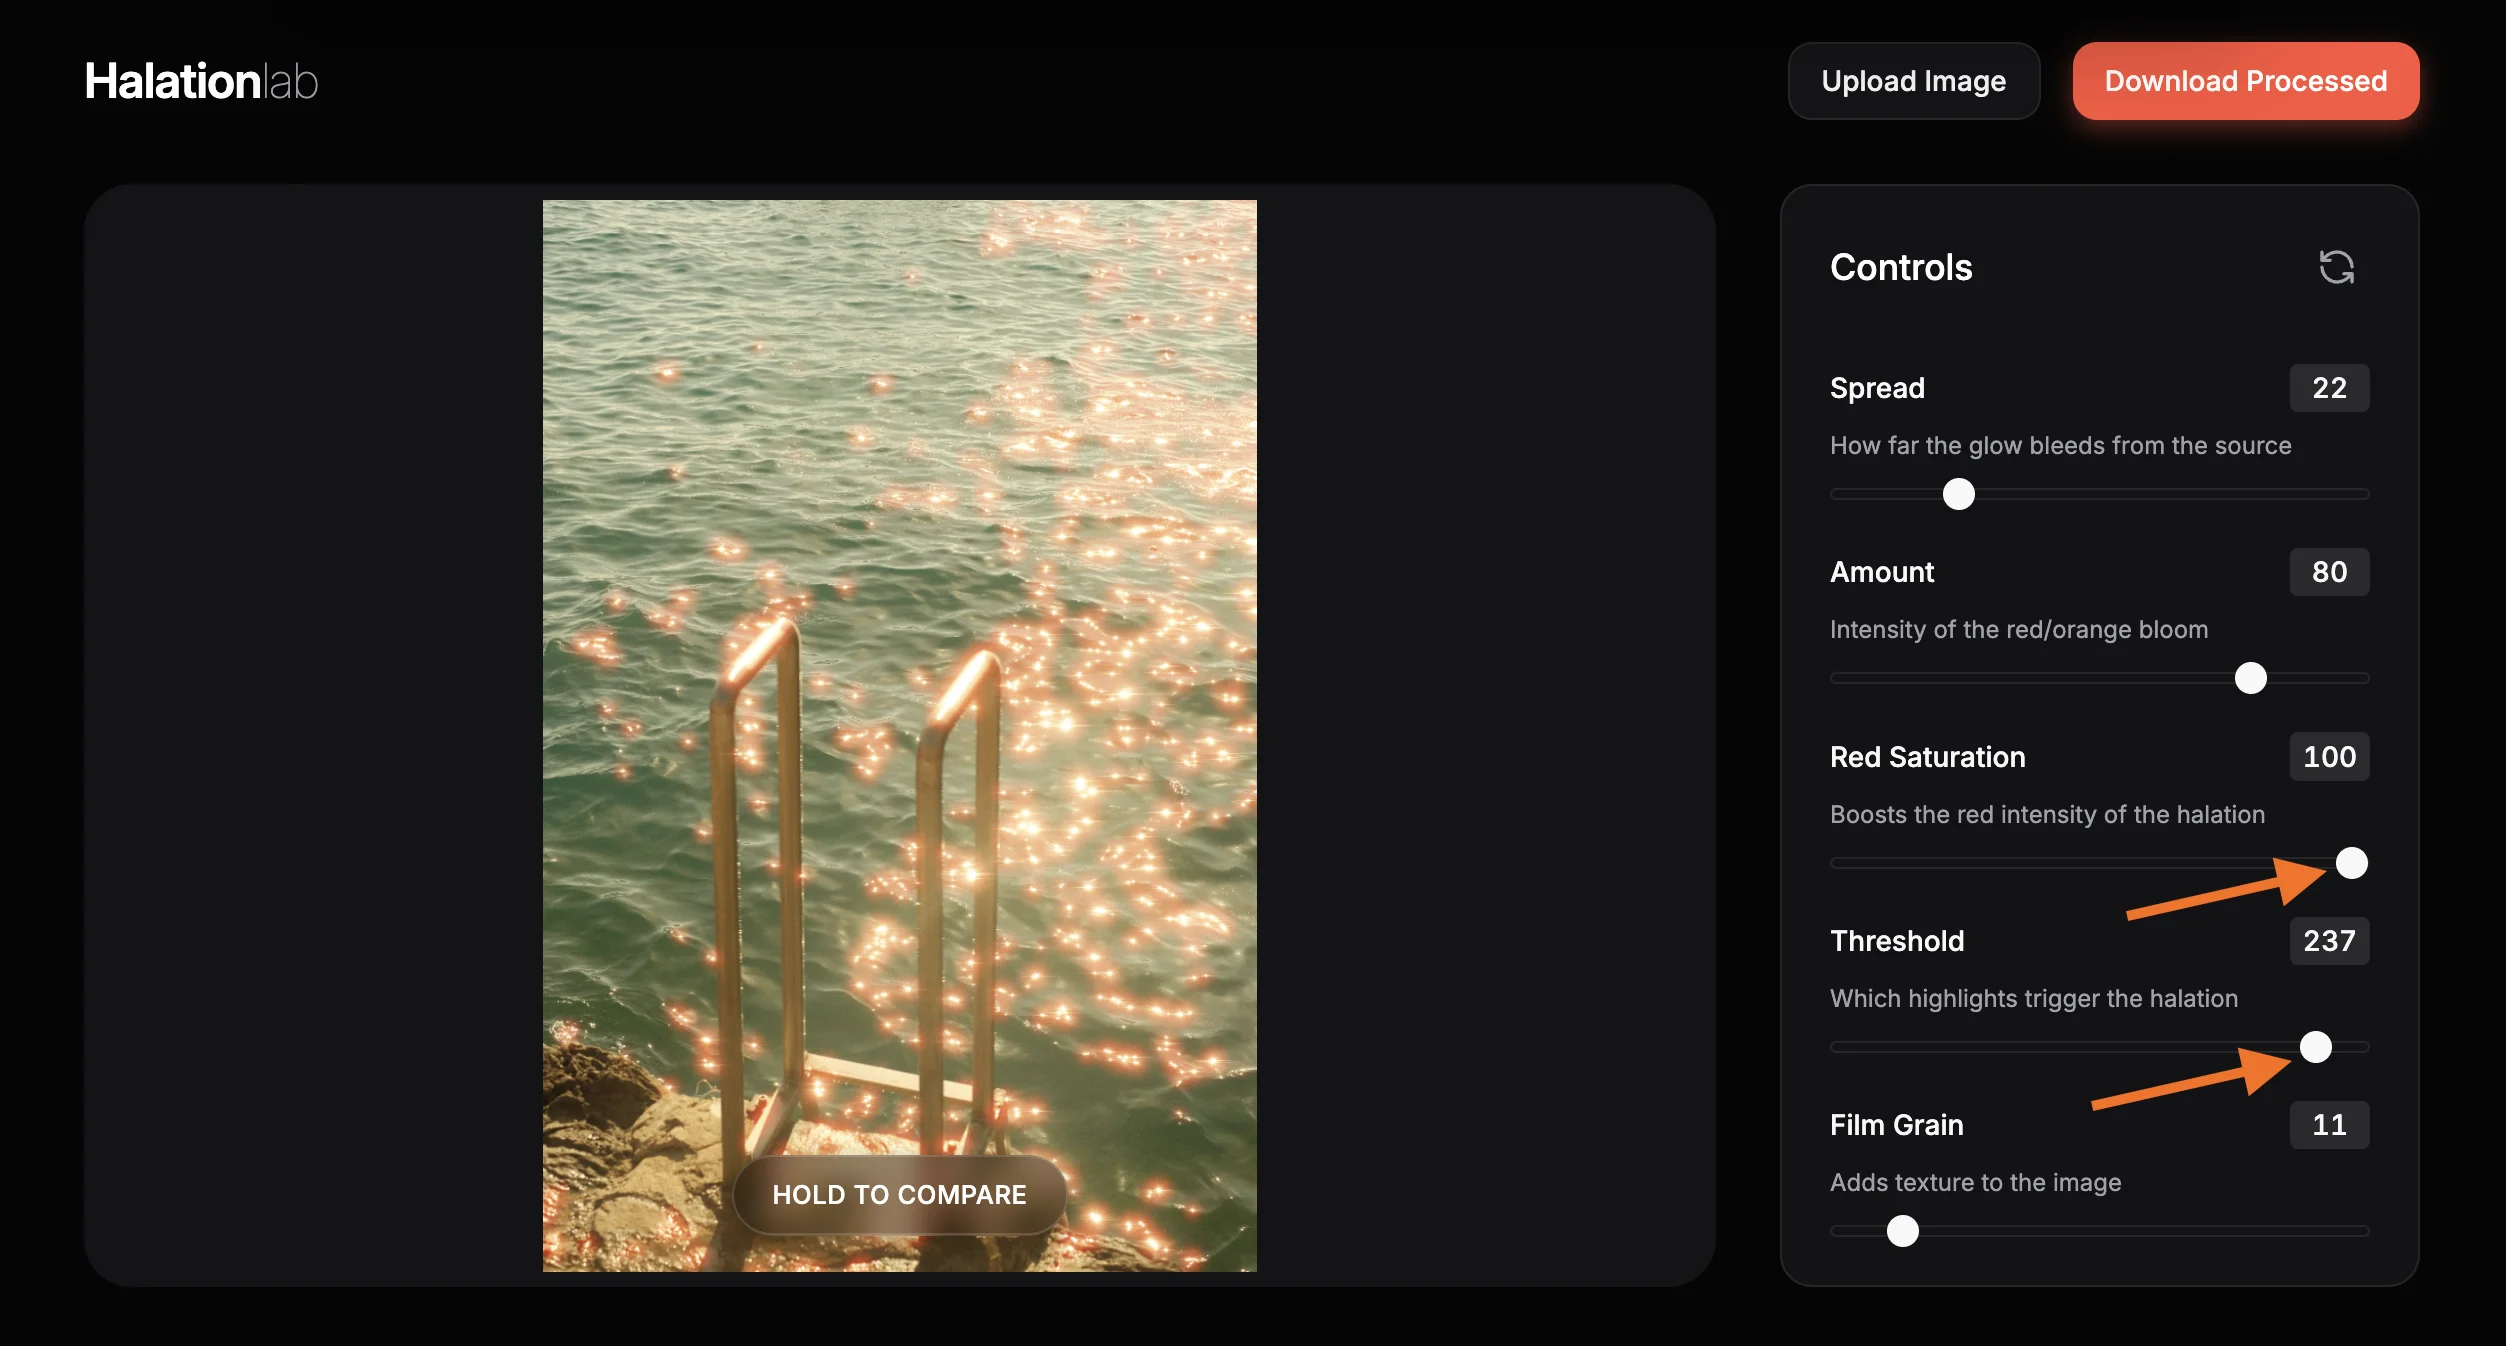
Red Saturation boosts the redness of the halation glow. At high values, the bloom shifts toward an intense red-orange, the signature CineStill look. Lower values produce a more neutral, warm glow. Threshold determines which bright pixels trigger the effect. A high threshold (e.g., 240+) means only the very brightest highlights like streetlights will glow. A lower threshold catches more mid-tones, creating a softer, more pervasive bloom across the whole image.
Add Film Grain & Compare
Film Grain adds realistic monochromatic noise to the final image, mimicking the texture of analog film. Use a light touch (5–15) for subtle texture, or go higher for a gritty, vintage look. Hold down the "Hold to Compare" button on the canvas to instantly see the original unprocessed image. Release to return to the halation version. This is the fastest way to judge whether your settings are just right.
Download in Full Resolution
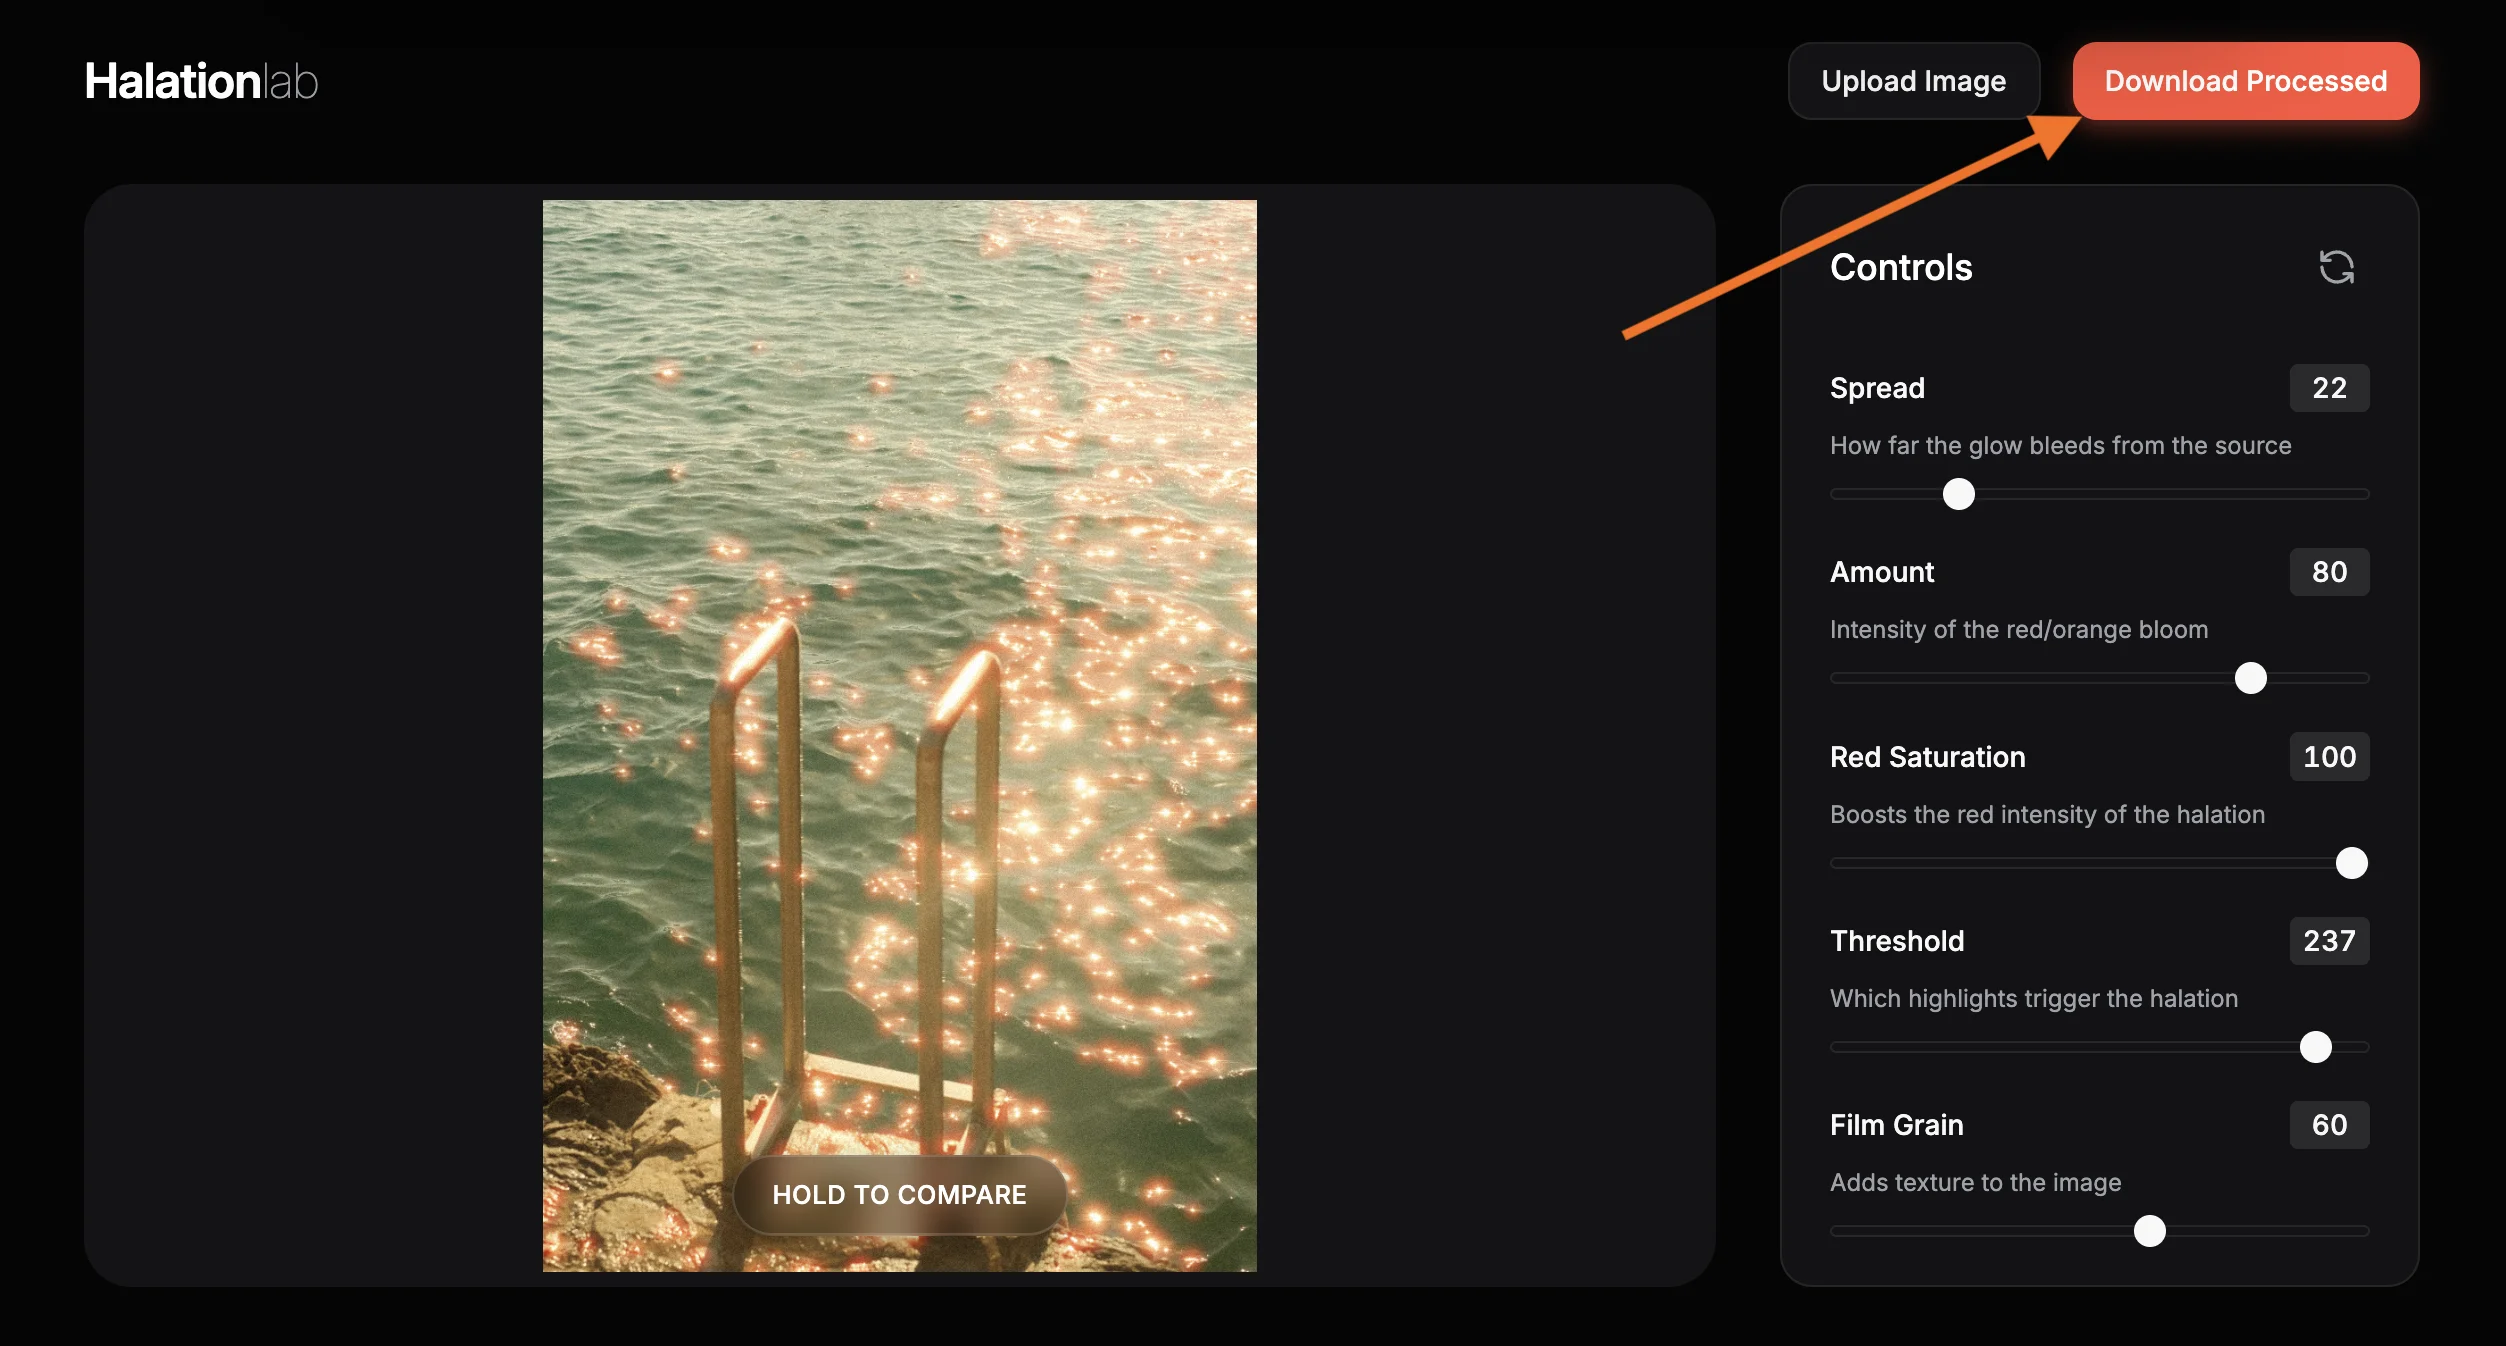
When you are happy with the result, click "Download Processed". Halation Lab re-runs the algorithm at your image's original full resolution and saves it as a high-quality JPEG (95% quality). The filename is automatically appended with "_halation" so you can always tell the processed version apart from the original. Click the reset button (↺) anytime to return all sliders to their starting values.
Quick Settings Reference
| Setting | What it does | Tip |
|---|---|---|
| Spread | Controls the blur radius of the halation glow | Higher = wider, dreamier bloom; Lower = tighter glow |
| Amount | Intensity of the red/orange bloom added | 90+ for dramatic CineStill; 30–50 for subtle warmth |
| Red Saturation | Boosts the redness of the halation glow | 95+ for iconic red CineStill glow; lower for neutral |
| Threshold | Brightness cutoff for triggering halation | 240+ = only brightest highlights; 150–200 = softer overall |
| Film Grain | Adds monochromatic noise for texture | 5–15 for subtle film texture; 30+ for gritty vintage |
Default vs. CineStill 800T Preset
| Setting | Halation Lab Default | CineStill 800T Preset |
|---|---|---|
| Spread | 10 | 25 |
| Amount | 50 | 90 |
| Red Saturation | 50 | 95 |
| Threshold | 200 | 242 |
| Film Grain | 0 | 10 |
The CineStill 800T preset is pre-configured on the dedicated landing page. Use it as a starting point and tweak from there.
Frequently Asked Questions
Guides & Tutorials
CineStill Halation Guide
Simulate the iconic red glow of CineStill 800T in digital post.
Whiteborder Lab Guide
Add professional frames, customize border widths, and export in batch.
Add Border to Photo
Add a clean border online for free. Choose width, color, and aspect ratio.
Other Tools
Halation Lab
CineStill 800T film halation effect
CineStill 800T Preset
Preloaded iconic red glow settings
Whiteborder Lab
Custom borders & aspect ratios
Film Border Generator
Classic film look border
Double Border Generator
Sharp double frame border
InstantCard Lab
Photo cards with camera metadata
Carousel Lab
Seamless Instagram carousels
Grading Lab
Color palette extractor
FotoZine Lab
Create printable photo zines
Camera Finder
Find your perfect Fujifilm